Three Ways to Start Recording
VoxWrite gives you three flexible ways to start recording, so you can choose the method that best fits your workflow. Whether you prefer clicking buttons, using floating controls, or working entirely with your keyboard, VoxWrite adapts to your style.
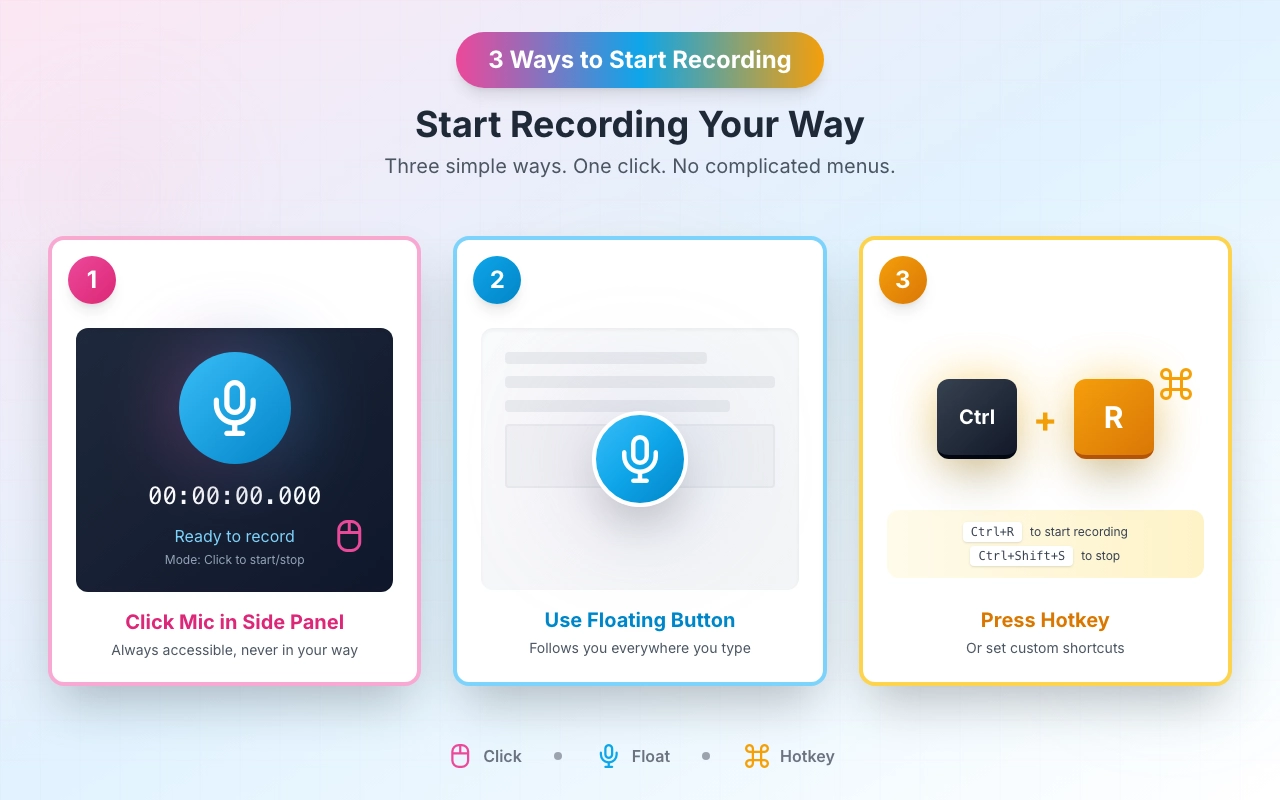
1. Click the Microphone Icon in Side Panel
The first way to start recording is through VoxWrite's side panel.
How to use:
- Click the VoxWrite extension icon in your Chrome toolbar and then click the "Record" button.
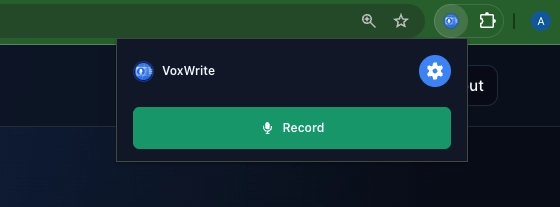
- The side panel opens on the right side of your browser
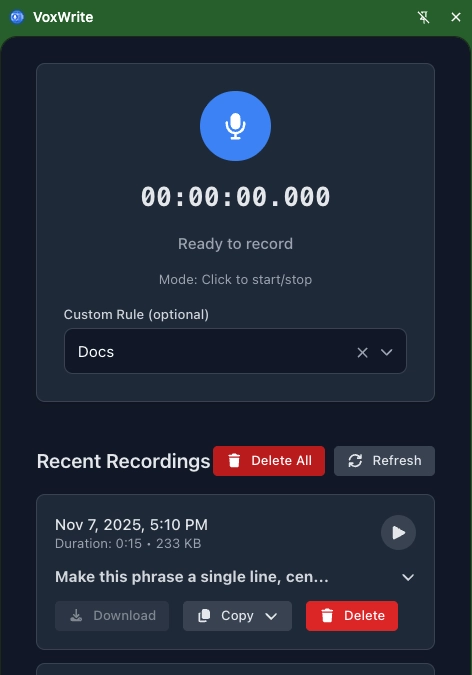
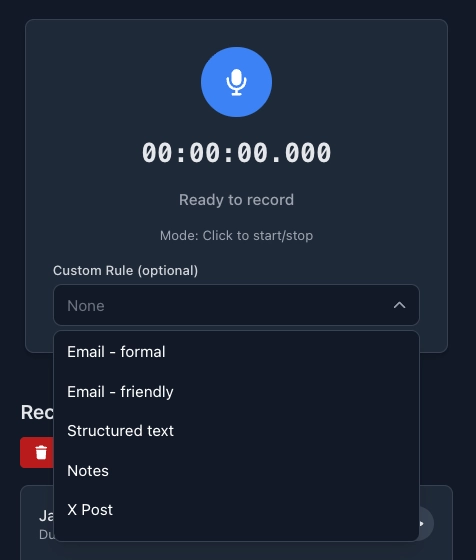
- Choose in the dropdown what Custom Rule you want to apply to your speech and click the large microphone button to start recording. (If no rules chosen — VoxWrite works right away as simple speech-to-text.)
- Click again to stop
Benefits:
- Always accessible from any webpage
- Below the microphone you can see the list of all your recordings. You can manage, download, copy, delete, or view each record. Learn more how to manage your recordings →
2. Use the Floating Button
A convenient bubble button that floats over your webpage content, following you as you scroll.
How to use:
- The floating bubble appears automatically on pages where it was set up.
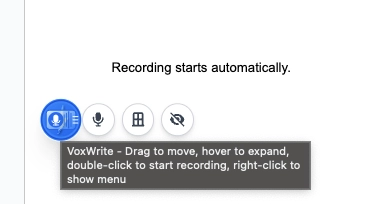
- Double click the bubble to start recording
- Microphone appears and the recording starts automatically.
- Click the microphone icon to stop
Customization: The floating bubble can be customized to match your preferences. Learn how to set up the bubble →
When to use this method:
- When you want quick access without opening panels
- When working in full-screen or focused mode
- When you want minimal distraction from your work
Benefits:
- Always visible, never hidden
- Double-click access from anywhere on the page
- Follows you as you scroll
3. Press Your Custom Keyboard Shortcut
For power users who prefer keyboard-first workflows, VoxWrite supports fully customizable hotkeys.
Example of Default shortcuts:
- Start recording:
Ctrl + R(Mac) - Stop recording:
Ctrl + Shift + S(Mac)
How to use:
- Press your configured hotkey from any text field
- When microphone appears start speaking immediately
- Press the stop hotkey when finished
- Your transcribed text appears in the active field
Customization: You can configure custom keyboard shortcuts to match your existing workflow. Learn how to configure hotkeys →
When to use this method:
- When you want the fastest possible workflow
- When your hands are already on the keyboard
- When you're switching rapidly between typing and speaking
- When you prefer not to use your mouse
- When working with multiple applications simultaneously
Combining Methods
You're not limited to one method! Many users combine approaches:
- Start with side panel to configure settings and manage your recordings, then use floating bubble for quick recordings
- Use keyboard shortcuts for rapid dictation, then open side panel to review results
- Switch methods based on the task: hotkeys for emails, bubble for forms, panel for long documents
<< How to generate custom Anthropic API key | Setting up the bubble (floating button) >>